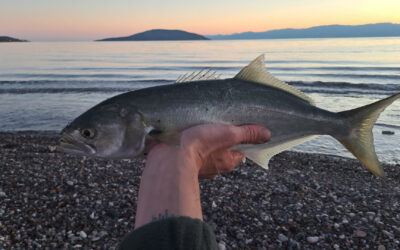
I still remember the first little tunny I brought back to the van on a warm afternoon in southern Greece. The sea was calm, my hands smelled of fish and salt, and I was already thinking about dinner while cleaning the deck. I had caught the fish fair and square from shore, bled it quickly, or so I thought, and fifteen minutes later it was lying in the cooler.
That evening, standing over a small pan with olive oil sizzling, I was confident. Ten minutes later, I was chewing through a dry, metallic-tasting piece of fish and wondering what I had done wrong.
That meal bothered me more than a lost lure. Little tunny should not taste like that. Over the next seasons, cooking my catches, I learned that the problem was not the species but my handling and cooking. Once I changed how I bleed the fish and how I treat it in the pan, the metallic taste disappeared completely. This is exactly how I do it now, in a way that works in a van kitchen with one pan, one knife, and no room for mistakes.
Why Little Tunny Gets a Bad Reputation on the Plate
For a long time, I treated little tunny like a smaller tuna. Quick bleed, fast fillet, high heat, done. That approach works for some fish, but not for this one. Little tunny has dark, blood-rich meat, and if you rush the bleeding or ignore the bloodline, that iron taste stays locked in the flesh.
What changed everything for me was slowing down the first five minutes after the catch. Bleeding properly, giving the fish time to drain, and later trimming with intention made more difference than any spice or marinade ever did. It also helped me stop blaming the fish for my own shortcuts.
If you already put effort into choosing the right lure and reading the water, things I learned the hard way while fishing and writing guides like my breakdown of gear choices on the best saltwater lures, it makes sense to show the same care once the fish is on land.
How I Bleed Little Tunny to Avoid the Metallic Taste
Bleeding starts immediately after the fish is landed. Not later at the car. Not back at the van. Right there, while the heart is still pumping.
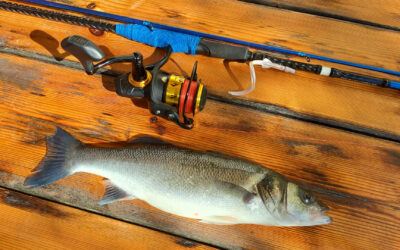
I usually deal with little tunny between 1.5 and 3 kg. Anything bigger is harder to handle safely from shore, and smaller fish tend to have better texture anyway.
Here is exactly what I do, step by step, once the fish is secured:
- Cut the gill arches deeply on both sides with a sharp knife
- Slice through the artery at the base of the throat latch
- Let the fish bleed in the water or in a bucket for at least 5–8 minutes
- If possible, keep the fish head-down so gravity helps
- Rinse the body cavity briefly with clean seawater
Those minutes feel long when you are tired and hungry, but they matter. When I rushed this part in the past, the blood stayed in the muscle and showed up later as that unpleasant metallic note.
After bleeding, I put the fish on ice as quickly as I can. In the van, that usually means a passive cooler with frozen bottles. I aim to cool the fish below 4 °C within an hour. If I cannot do that, I cook it the same day and skip storage entirely.
Cleaning and Trimming: Where Most of the Flavor Is Won or Lost
Back at the van or in a small apartment kitchen, I take my time with trimming. Little tunny is not a fish where you want to be lazy with the knife. I fillet the fish skin-on and then remove the dark bloodline completely. On a 2 kg fish, that strip can be 2–3 cm wide in the center of the fillet. It looks wasteful, but it is the single biggest reason the final dish tastes clean.
I portion the fillets into pieces about 3 cm thick and 8–10 cm long. Thinner pieces dry out too fast in a pan, thicker ones are harder to control with limited heat. Before cooking, I pat the fish dry and let it rest at room temperature for about 10 minutes. Cooking ice-cold fish straight from the cooler almost always leads to uneven doneness.
How I Pan-Fry Little Tunny in a Small Kitchen
Pan-frying is my go-to method because it works everywhere. One burner, one pan, no oven needed.
I keep the ingredient list boring on purpose:
- Little tunny portions, about 150–180 g per person
- 1–2 tablespoons olive oil
- Fine salt
- Black pepper
- Optional: a squeeze of lemon after cooking
I use a pan around 24 cm wide. Smaller pans crowd too fast and lower the temperature. I heat the oil over medium-high heat until it shimmers but does not smoke. On my camping stove, that usually takes about 2 minutes.
Then I add the fish and do nothing. No shaking, no flipping, no pressing. After about 2 minutes, the underside should have a clear golden crust. I flip once, cook another 1.5 to 2 minutes, and then take the pan off the heat.
The center should still be slightly translucent. Overcooking by even one minute turns the meat dry and brings back that strong flavor I worked so hard to avoid.
Once off the heat, I season lightly with salt and pepper. I learned to salt after cooking because early salting pulled moisture out and made the surface wet instead of crisp.
Why This Method Actually Works
Little tunny has less fat than bluefin but more blood-rich muscle than many coastal fish. Proper bleeding reduces iron-heavy residues, trimming removes what remains, and short, hot cooking keeps the texture tender.
Cooking to an internal temperature of roughly 52–55 °C is ideal. I do not measure it in the van, but visually the fish should flake slightly at the edges while staying glossy in the middle. If it looks fully opaque throughout, it is already too far gone.
From a food safety point of view, I only use fish that smells clean and has been kept cold. If the flesh feels mushy or smells sweet, I do not cook it at all. No recipe can fix a fish that was mishandled earlier.
My Takeaways After Many Failed Dinners
What I would tell a friend cooking little tunny for the first time is simple. Bleed longer than you think you need to. Trim more than feels comfortable. Cook less than feels safe. Most of my early mistakes came from rushing one of those three steps.
When I finally slowed down and respected what this fish needs, little tunny stopped being a compromise meal and became something I genuinely look forward to cooking after a long day on the rocks.
Good fish does not need tricks. It just needs attention, a hot pan, and the confidence to stop cooking early and sit down while it is still perfect.