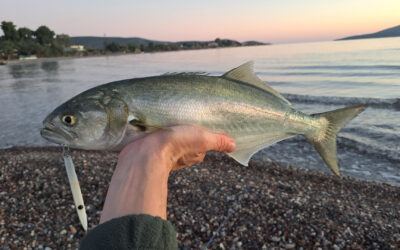
The fish was still cool when I laid it on the board, late afternoon light coming in from the side and that familiar smell of salt on my hands. I had already cleaned the little tunny by the water, but this was the moment where cooking could still go wrong. I’d ruined this fish before by treating it like canned tuna and cooking it too long. This time, I wanted a plate of pasta that tasted fresh, clean, and calm—nothing fancy, just honest food that works after a long session.
What finally made this recipe click for me wasn’t a new ingredient. It was understanding how little heat and time this fish actually needs, and how tomatoes, garlic, and chili can support it instead of covering it up. Once I stopped rushing, this became one of those meals I repeat without thinking.
Why This Pasta Works With Little Tunny
Little tunny is lean. That’s the main thing I used to ignore. If you fry it hard or simmer it like a sauce meat, it turns dry and grainy in minutes. What changed everything for me was cooking the pasta first, then building the sauce gently, and only adding the fish at the very end.
The tomato brings acidity, the olive oil carries flavor, and the chili adds warmth without heat overload. The fish stays soft, slightly pink inside, and still tastes like fish—not like something that’s been rescued with sauce. This approach also keeps the pan count low and the timing forgiving, which matters when you’re tired and hungry.
The Ingredients I Actually Use
Before listing anything, one honest rule I follow: this recipe only works with properly handled fish. If the little tunny smells sweet, feels mushy, or sat warm for too long, I don’t cook it. No sauce can fix that.
For two hungry people, this is what I usually use:
- Little tunny: 250–300 g trimmed fillet, skin off, bloodline removed
- Pasta: 200 g (spaghetti or short pasta both work)
- Olive oil: 2 tablespoons (about 30 ml)
- Garlic: 3 cloves, thinly sliced
- Chili: ½–1 fresh chili or about ½ teaspoon chili flakes
- Tomatoes: 250–300 g cherry tomatoes or about 250 ml passata
- Salt: 1 teaspoon for pasta water, plus more to taste
- Optional: 1 tablespoon capers or 2 anchovy fillets, parsley, lemon
In real life, I often don’t have all the optional stuff. Capers or anchovies help a lot if the sauce tastes flat, but the dish still works without them.
Step-by-Step: Little Tunny Pasta With Tomato, Garlic and Chili
This is one of those recipes where a short step-by-step actually helps, because heat and timing matter and things move fast once the pan is hot.
1) Prep the fish (about 3 minutes)
I trim off the dark bloodline completely. On a small fillet, that strip can be 2–3 cm wide, and it’s where most of the strong taste lives. I cut the remaining meat into chunks or short strips about 2–3 cm thick, pat them dry, and season lightly with salt. You can also cut them into bigger pieces, depending on what you prefer. I learned not to be shy here. Losing a bit of meat is better than tasting it in the final dish.
2) Start the pasta water (10–14 minutes)
I bring a pot of water to a boil and add about 1 teaspoon of salt, roughly 5–6 g. In the van, with a small burner, this often takes longer than at home. I cook the pasta until it’s about 1 minute shy of al dente, because it will finish in the pan later. If the pasta packet says 10 minutes, I expect closer to 12 or even 14 on a camping stove.
3) Build the sauce in one pan (6–8 minutes)
I heat 2 tablespoons of olive oil over medium heat. Garlic and chili go in first, and I let them soften gently for about 60–90 seconds. The goal is aroma, not color. If the garlic turns brown, I know I’ve gone too far.
Then I add the tomatoes. With cherry tomatoes, I squash a few with the back of a spoon and let everything cook for 3–5 minutes until juicy and slightly thick. If I’m using passata, I let it simmer gently and calm down for a few minutes. If I add capers or anchovy, this is the moment. This part used to be where I messed up most often. Now I’d rather lower the heat a bit than rush and burn the base.
4) Sear the little tunny fast (2–3 minutes)
I push the sauce to one side of the pan or briefly scoop it into a bowl. Then I turn the heat up to medium-high and add the fish. I sear it for about 45–60 seconds per side, just until the outside turns opaque and lightly colored. The fish should still be soft inside. If it’s fully cooked through at this stage, it will be dry later.
5) Combine and finish (about 2 minutes)
I add the drained pasta straight into the pan, along with about 60–120 ml of pasta water—a small mug. I stir until the sauce turns glossy and coats the pasta instead of pooling at the bottom. Then the fish goes back in. I let it warm through for 30–60 seconds, no more. I taste, adjust salt if needed, and finish with parsley or a small squeeze of lemon if I have one. That last minute makes or breaks the dish. The pasta water ties everything together, and the fish stays tender because it’s not punished by heat.
Food Safety and Storage on the Road
When I don’t cook the fish immediately, I keep it properly cold. That means iced in a cooler and as close to or below 4 °C as possible. If I can’t keep it cold, I cook it the same day or not at all.
Leftovers are fine if the fish was handled well from the start. I eat leftover pasta within 24 hours, stored in a closed container, and reheat it until it’s steaming hot all the way through. If it smells odd the next day, it goes in the bin. Food poisoning is not something I want while traveling.
In a small kitchen, I also pay attention to basics: separate board for fish if possible, wash knife and hands with hot soapy water, and don’t let raw fish juices drip onto other food. Space is tight, mistakes happen fast.
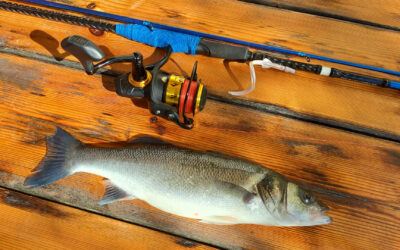
Good handling starts before the fish ever reaches the pan, which is why I’m picky about reliable gear. A smooth reel helps me land fish fast and clean, so bleeding and icing are easier to do right. My best saltwater spinning reels list is here: best Saltwater Spinning Reels.
Final Thoughts: What I’d Remember for Next Time
If you want this little tunny pasta to work, I’d keep a few things in mind.
Trim the bloodline properly and keep the fish cold from the start. Cook the sauce gently and don’t burn the garlic. Sear the fish fast and add it back only at the very end, for under a minute. Use 60–120 ml of pasta water to make the sauce cling instead of swim. If the flavor feels flat, capers or anchovy fix it faster than extra salt.
This isn’t fancy food. It’s the kind of meal I eat sitting on a camp chair, looking at a dark harbor, happy that the fish turned into something warm and satisfying instead of a lesson learned too late.