The first time I cleaned a fresh sepia on the coast of Greece, I ruined it before it ever touched the pan. The flesh looked perfect when I cut it open, thick and glossy, but twenty minutes later it came out rubbery and dry.
I remember standing there with hot oil popping, ink on my fingers, wondering how something that fresh could turn so wrong. That meal was edible, but it was disappointing, and that bothered me more than losing a lure earlier that day. It was the point where I realized that sepia needs more respect than most fish.
Since then, I have cleaned and cooked a lot of sepia from shore caught sessions around the Mediterranean. Some meals worked beautifully, others failed in very specific and repeatable ways. What finally changed everything was slowing down and understanding that sepia punishes impatience. Cleaning and preparing it is not complicated, but small mistakes stack up fast.
Why Sepia Turns Tough So Easily
Sepia flesh is dense, lean, and unforgiving. It has very little fat and almost no buffer when it comes to heat or handling. Early on, I treated it like squid, pulling too hard during cleaning and assuming it would forgive rough treatment. It does not. Damaging the muscle fibers before cooking already sets you up for a chewy result.
Cooking time was my second big mistake. I used to leave sepia in the pan for three or four minutes because that felt “safe.” In reality, that time window sits right between its two comfort zones. Sepia wants either very fast heat or very long, gentle cooking. Anything in between tightens the flesh and squeezes out moisture.
Once I understood that, everything became calmer. I stopped guessing, watched the flesh instead of the clock, and accepted that restraint matters more than bravado. Even simple meals improved immediately.
Cleaning Sepia Step by Step Without Damaging the Flesh
Before getting into steps, it helps to understand the goal. Cleaning sepia is about removing ink, cartilage, and membranes while touching the meat as little as possible. I work with a small sharp knife, a bowl, and cold water. No scraping tools, no squeezing, no rushing.
Separate the head from the body with one clean cut just behind the eyes, keeping the ink sac intact. I lay the sepia on the board with the mantle facing me and locate the narrow section where head and body meet. One decisive cut is enough. A clean cut matters because the ink sac sits close by. If it bursts, it stains everything and makes you rinse too much later, which already hurts texture.
Gently pull out the internal organs and ink sac in one motion and set them aside. After the cut, I grip the head and pull steadily. Most of the organs come out attached. I always do this over a bowl because liquid escapes easily. If I see the ink sac clearly, I remove it first and either save it cold or discard it immediately. Letting it burst on the flesh creates unnecessary mess and stress.
Remove the transparent cartilage bone from inside the mantle with two fingers, slowly. Inside the mantle there is a clear, plastic like bone. I pinch the end and pull it out in one smooth motion. No twisting, no force. If it tears, it usually means I rushed. Taking ten calm seconds here avoids fragments being left behind and stops me from digging around with the knife.
Peel off the thin outer skin if you want a cleaner look, starting at the edge and pulling steadily. This step is optional, but I often do it. It improves presentation and keeps the pan cleaner. I lift the skin at one corner with my fingernail and pull slowly, like removing a sticker. Pulling too fast tears the skin and leads to scraping, which is exactly what I try to avoid.
Rinse the body briefly under cold running water for no more than 10 seconds. The rinse is not for deep cleaning. It is only to remove stray ink or bits of membrane. Long rinsing makes the flesh waterlogged and slippery. If something sticks, I remove it with my fingers instead of rinsing longer.
Pat the flesh completely dry with paper towel before cutting. Drying matters more than most people think. Wet sepia cools the pan, splutters in oil, and steams instead of searing. I press, not rub, and dry inside and outside. If I am not cooking immediately, I wrap it loosely in paper towel and keep it cold.
Handled this way, the whole process stays calm and controlled. I start cooking with clean, dry flesh that actually has a chance of staying tender.
How I Cut Sepia for Even Cooking
Cutting sepia is not just about portion size, it is about how heat moves through the flesh. I used to cut thick rings because they looked good, but they cooked unevenly. The outside tightened while the center lagged behind.
Now I aim for pieces between 1.5 and 2 centimeters thick when pan cooking. At that thickness, heat reaches the center quickly and evenly. For slow cooking, such as stews, I keep pieces larger, around 4 centimeters, so they survive long cooking without drying out.
I always cut across the grain, never along it. When I ignore this, the sepia feels stringy even if cooked carefully. This small detail has more impact on texture than most seasoning choices.
Cooking Times and Heat That Actually Work
This is where most meals fail. Sepia has two safe zones, fast or slow. Anything in the middle is risky. For pan cooking, I heat olive oil until it shimmers but does not smoke, roughly 180°C. The pan must be hot enough that the sepia sizzles the second it touches the surface.
Add the pieces in a single layer, never crowded. If pieces touch or overlap, they steam instead of sear. Steam is the silent texture killer. I use a pan at least 26 to 28 centimeters wide for one medium sepia. If I have more, I cook in batches. Crowding drops the oil temperature and releases water, and once that happens, chewiness is almost guaranteed.
Cook for 45 to 60 seconds per side only. I treat sepia more like toast than meat. For pieces around 1.5 to 2 centimeters thick, 45 to 60 seconds per side is enough. Thicker cuts might need slightly longer, but I still stay under 90 seconds per side. Once cooking drifts past that, the flesh tightens fast.
Remove as soon as the flesh turns opaque and slightly golden. I watch the color change closely. The flesh goes from glossy and translucent to opaque white, with a light golden edge where it touched the pan. I do not chase deep browning. If I want more color, I cut thinner pieces instead of cooking longer.
Rest the sepia off heat for one minute before serving. Resting is practical, not fancy. Sepia continues to cook briefly after removal. If I slice it immediately, steam escapes and the bite feels drier. One minute on a warm plate lets juices settle and softens the texture noticeably.
When I follow these steps, the process feels controlled. When I ignore them, I end up trying to fix rubber with more lemon or more salt, which never really works.
Salt, Acid, and When I Add Them
I used to salt sepia early, thinking it would help flavor penetrate. Instead, it pulled moisture out before cooking even started. Now I season only after the first turn in the pan, never before.
Acid is even trickier. Lemon or vinegar before cooking toughens the flesh almost instantly. I add acid only at the very end, often off heat, and only a few drops. When I respect this order, the texture stays clean and supple.
Food Safety and Storage I Never Skip
Sepia spoils quickly, especially in warm conditions. I never leave it uncleaned longer than two hours above 15°C. Once cleaned, I store it cold, drained, and covered, and use it within 24 hours.
I also keep cleaning separate from everything else. Sepia ink stains are annoying, but bacteria are worse. If the flesh smells sour or feels slippery, I do not try to save it. Freshness matters more here than clever cooking.
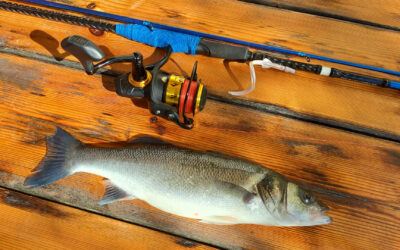
Good gear helps on the fishing side, and choosing reliable tools is part of that mindset too. I approach cooking with the same care I apply when selecting my saltwater rods, because preparation starts long before the kitchen.
What Many Recipes Miss About Sepia
While reading other recipes, I noticed that many focus on marinades and sauces but skip cleaning details. Others suggest vague cooking times like two or three minutes, which sits right in the danger zone.
What is often missing is an explanation of texture mechanics. Sepia is treated like a flavor carrier instead of a fragile ingredient. Once I stopped copying shortcuts and trusted what I saw, smelled, and felt in the pan, my results improved far more than with any spice mix.
My Real Takeaways After Many Meals
Cleaning and preparing sepia taught me patience more than technique. What works is not complicated, but it demands attention from the first cut to the final second in the pan. Gentle cleaning preserves structure, precise cutting controls heat, and disciplined timing protects moisture.
This approach does not forgive sloppy handling or guessing. If the sepia was mishandled early, even perfect cooking cannot fully save it. But when freshness, restraint, and timing come together, sepia becomes one of the most satisfying meals I cook from my own catch. It is quiet food, honest, and worth slowing down for.